
Please refer to the Settings Guide for details.
 3.9.1 Creating a New Project
5.4.1 System Settings [Display] Settings Guide
The following describes how to use applications that use API functions.
Please refer to the Settings Guide for details.
3.9.1 Creating a New Project
5.4.1 System Settings [Display] Settings Guide
Double click the shortcut on the desktop, ![]() or from the [Start] menu, select [All Programs], [Pro-face], [GP-Pro EX *.*](*.* indicates the version number), and click [GP-Pro EX].
or from the [Start] menu, select [All Programs], [Pro-face], [GP-Pro EX *.*](*.* indicates the version number), and click [GP-Pro EX].
When you launch GP-Pro EX, the following dialog box appears. From the next time you start GP-Pro EX, you can check for software update information every time you launch GP-Pro EX. Select the [Check for Update when the program starts] check box, then click [OK].
If you want to check for updates only when necessary, clear the check box and click [OK].
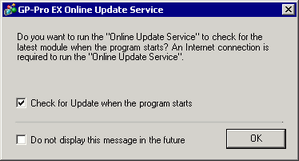
For the procedure on checking for updates only when required, see the following.
3.11 How to Update GP-Pro EX
When starting up GP-Pro EX for the first time, the user registration webpage appears.
The [Welcome to GP-Pro EX] dialog box appears. Select [New] and click [OK].
From [Series] select [SP5000 Series], and from [Box Module] select Open Box. Also, select any display module from [Display Module]. Click [Next].

When [SP-5B40] is selected, you cannot select [SP-5600TA].
Select [Manufacturer], [Series], and [Port], and then click [Communication Settings].
The [New Project File] dialog box closes and the [System] tab is displayed in the main window. Click [Device/PLC1], and configure the communication settings.
The [Communication Settings] details differ depending on the device/PLC series. See the "GP-Pro EX PLC/Device Connection Manual" for your device/PLC.
It is recommended to keep the default settings for [Timeout], [Retry], and [Wait to Send].
To open the editing screen, open [Screen List] window and double-click the base screen that is displayed, or from the [Screen] menu, click [Open Screen].
Draw the screen interface. Refer to the following for the drawing process. You can also refer to chapters related to the features you want to use, such as alarms.
3.2 Creating a Project - Start / Create Screen / Save / Exit
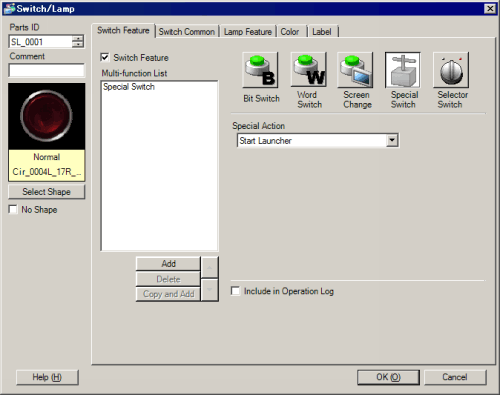
You can set the special [Start Launcher] switch to start the Launcher. Configure this as needed.
From the [Project] menu, select [System Settings], and click [Display Unit].
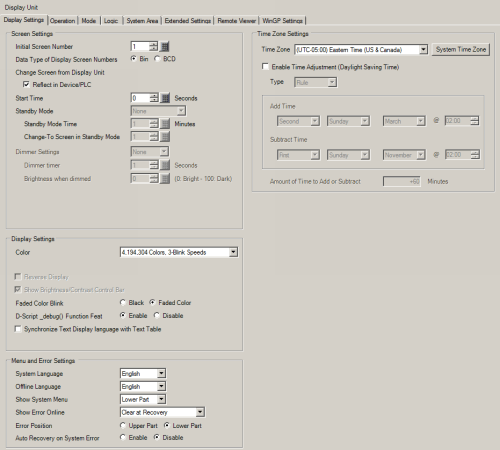
[Standby Mode] cannot be configured here. Configure this as needed on the display unit side.
Set the time zone to the region where the display unit is installed using [Time Zone Settings] in the [Display Settings] tab.
Daylight savings time cannot be configured.
In the [Project] menu, select [System Settings] and then select [Display Unit]. Open the [WinGP Settings] tab.

When setting functions that use backup memory such as alarms, sampling, etc., select where to save data in [Save in] field under [Historical Data Retentive Settings].
When [Folder] is selected, enter the path of the folder used to store data as a replacement for backup memory (SRAM) in [Historical Data Storage Location].
When you select the [Folder] in [Save in], the D drive root folder (directory) is the initial setting value in [Historical Data Storage Location]. Check the external storage path to use and change the setting.
When saving to external storage, the backup data risks being corrupted when the display unit is powered off while accessing the external storage, so set the [Save Condition] considering the timing with which the display is powered off.
When setting the write filter (write protection) to the system card, do not set the the save to location to drive C.
When selecting a [Folder] in [Save in], you can save up to 5MB of backup data.
When you want to keep the history of error messages displayed on the Run Screen, select the [Save Error Message] check box and specify [Save in]. The data is saved to the path specified in the [Destination Folder].
Also set the [Number of Stored Items], [Number of Files to Save] and [File Name]. For more details, please refer to the following.
38.8 Keep History of Error Messages Displayed in WinGP
If you have configured functions that use external storage, in the [Destination Folder] field, enter the path to save the data.
When [SD/CFast Card Destination Folder] is enabled: Enter the storage path in the [SD/CFast Card] field.
When [USB Storage Destination Folder] is enabled: Enter the storage path in the [USB Storage] field.
As the initial destination to save to, the following respective paths are set. Check the external storage path to use and change the setting.
[SD/CFast Card]: \D\CFA00
[USB Storage]: \D\USBHD
When setting the write filter (write protection) to the system card, do not set the the save to location to drive C.
Specifies the port to be used for transfer in [Transfer Settings].
When using a user application that uses an API, select the [Use API Communication] check box and set the port to a value from 0 to 65535.
Please do not use port numbers 8000 to 8019, which are designated as the port numbers for transfer.
Specify a port number that is not the same as the [Port Number] in [Transfer Settings] and the ports used for communicating with other connected devices/PLCs.
The method of configuring programming applications to use the API and the API functions that can be used are the same as with the IPC Series. For more details, please refer to the following.
38.5 Retrieve WinGP information or Operate WinGP from user application
Set a toggle to launch the application when executing a user application from the Run Screen. For more details, please refer to the following.
38.6.1 Procedure - Running the Application from WinGP / Activate Switch
You can also launch an application that uses D-Script and Trigger Action.
38.6.2 Procedure - Running the Application from WinGP / D-Script Trigger
From the [Project] menu, select [Save As]. Specify the location and file name for the project, and save.