 |
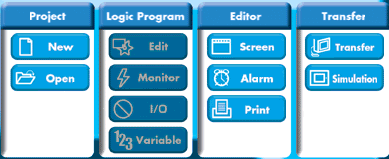
| 1.In Project Manager, click [Screen]. |
 |
 |
| |
| 2.Create a base screen and select the icon, |
 |
of [Q tag]. |
|
| |
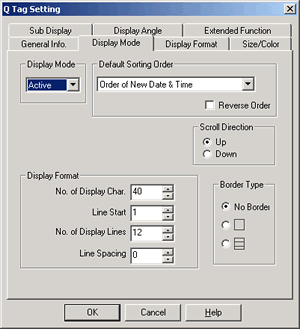
| 3.The [Q tag Settings] dialog box will appear.
Select the [Display Mode] tab. |
 |
 |
| |
| 4.Select [Display Mode]. Select [History] for
this time. |
 |
 |
 |
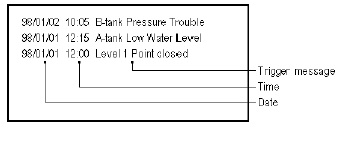
| Active |
| The currently triggered alarms only display. The restored alarm
is automatically deleted. |
 |
|
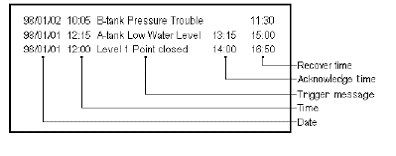
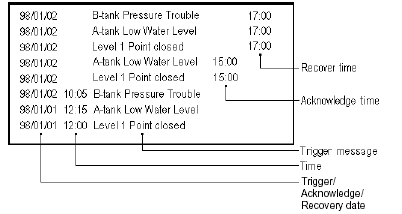
| History |
| The messages display in the order of the triggered. Also each
alarm message can be displayed with time of [Trigger], [Acknowledge], and [Recover]. |
 |
|
| Log |
| Every time there's a change like [Trigger], [Acknowledge],
and [Recover], a message displays. In addition to it, the time of [Trigger], [Acknowledge],
and [Recover] can be displayed. |
 |
|
|
| |
| 5. |
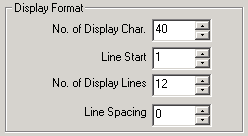
In [Display Format], set [No. of Display Char.], [Line Start], [No. of Display
Lines], and [Line Spacing] as you like. |
|
 |
 |
 |
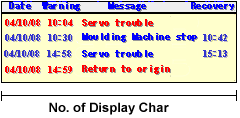
| No. of Display Char. |
| Set the number of the characters displayed with Q tag. Set the
number of characters in a single byte. |
 |
|
| Line Start |
| Set from which line alarm messages display. [1] will be fine
normally. |
 |
|
| No. of Display Lines |
| Set the number of lines displayed with Q tag. |
 |
|
| Line Spacing |
| Set the line space by a dot. |
 |
|
|
| |
| 6.Select [Scroll Direction] as you like. |
 |
 |
 |
| Up |
| Alarm messages display from the bottom and the older message
is scrolled up. The latest alarm message always displays at the bottom. |
 |
|
| Down |
| Alarm messages display from the top and the older message is
scrolled down. The latest alarm message always displays on top. |
 |
|
|
| |
| 7. |
[Default Sorting Order] and [Border Type] can be selected only when [Extended
Function] is used in C-Package03.As for the details, refer to (Application) |
|
 |
 |
 |
 |
| |
| 8.Click the [Display Format] tab. |
 |
 |
| |
| 9. |
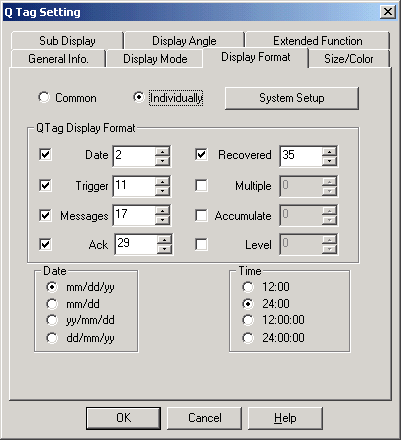
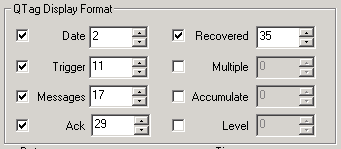
Select [Common] or [Individually] and set [Date], [Messages] etc. by a single
byte. Select [Individually] for this time. |
|
 |
| |
 |
 |
 |
| The [Sample] window appears at the bottom of the screen. Referring to this,
set the display positions of each item. |
 |
 |
 |
| Memo |
| •How to set Q tag Display Format |
| |
• |
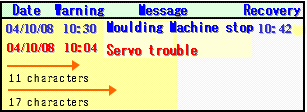
Set the value in a single byte for the space from the start of Q tag to each
item.For example, when the value of [Trigger] is [11] and the value of [Messages]
is [17], the triggered time displays after 11-character space from the start and
the messages display after 17-character space from the start. |
| |
|
|
| |
|
 |
| |
|
|
| |
• |
For non-display item, set OFF for the check box. When using C-Package02 or
before, set [0] for the No. of char. (For C-Package02 or before, the check box
does not display) |
|
| |
| 10.Select the format for [Date] and [Time]. |
 |
 |
| |
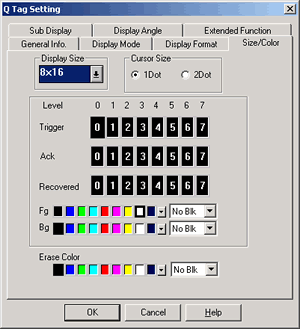
| 11.Next, select the [Size/Color] tab. |
 |
 |
| |
| 12.Set [Display Size]. |
 |
 |
| |
| 13.Set the thickness of the cursor displayed in
Q tag for [Cursor Size]. |
 |
 |
| |
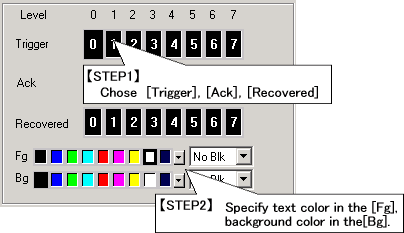
| 14.Set colors of displayed alarm messages and
[Erase Color] as you like. |
 |
| • |
How to set colors of alarm messages |
 |
|
|
| |
 |
| |
|
| • |
[About setting [Erase Color] |
 |
| |
In [Erase Color], set the color of the area where no message displays in Q
tag Area. |
| |
 |
|
| |
| 15.Click [OK], and place Q tag on the base screen. |
 |
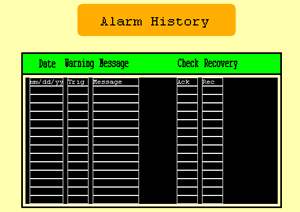 |
 |
| Memo |
| |
• |
The squares and the item names displayed in Q tag after placing Q tag are
not displayed on GP. |
 |
| |
|
 |
 |
| |
• |
Therefore it's required to draw the item names as you like beforehand
by using Drawing |
 |
| |
|
 |
 |
| |
• |
As for [Border], using [Extended Function] of C-Package03
allows the following two kinds of display
→As
for the details, refer to (Application) |
 |
| |
|
 |
 |
| |
• |
| [[When drawing a line in Q tag,] |
|
[Placing an external frame] |
|
 |
| |
|
 |
|
 |
|
| |
|


 沪ICP备05028659号-3


