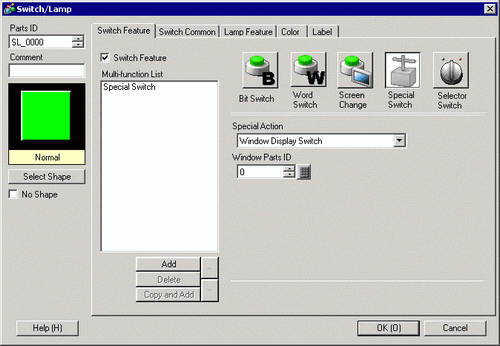
The following shows how to set security levels on screens.
23.3 Limiting Screen Access by Authority
Please refer to the Settings Guide for details on special switches.
10.15.4.1 Special Switch - Switch Features, Security
For details on parts that you can set up with security levels, see the following.
23.5.2 Security Settings for Each Part
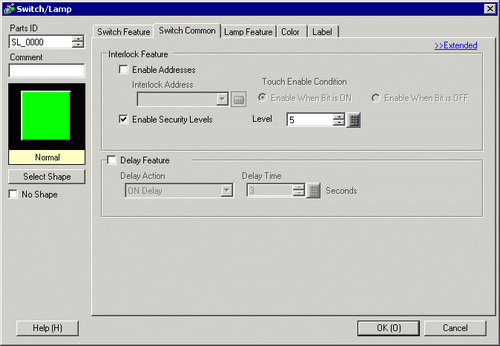
Set security level 5 to the switch to enable switch operation only when logged in with level 5.
Also, place a special switch to log in when you have only security level lower than level 5.
Select a switch that you want to set up with a security level, and from the [Edit (E)] menu click [Change Attributes (M)], or right-click the switch and select [Change Attributes (M)].
Settings dialog box will be displayed also by double-clicking the switch.
When the settings dialog box appears, click the [Switch Common] tab.
In [Interlock Feature], select the [Enable Security Levels] check box and set "5" for the level.
You can also set the interlock feature for each part by selecting the [Enable Addresses] check box and setting the interlock address.
Click [OK] and the settings dialog box is closed.
From the [Parts (P)] menu, point to [Switch/Lamp (C)] and select [Special Switch (P)], or click , and place the Switch on the screen.
Double-click the placed Switch part. The following dialog box appears.
In [Select Shape], select the Switch shape.
In the [Special Action] list, select [Security].
In the [Action] list, select [Log in].
As needed, set the color and display text on the [Color] and [Label] tabs, and click [OK].
Depending on the shape, you may not be able to change the color.
When you select a switch and press the [F2] key, you can directly edit the text on the label. When [Text Table] is selected, you can change the current Text Table.
To create a switch for clearing the security level, you can use a Special Switch, set its [Special Action] to Security, and its [Action] to [Log off].