Please refer to the Settings Guide for details.
25.9.4 Display/Save in CSV
25.10 Sampling Data Display Guide
For details on how to draw parts, and defining the address, shape, color, and labels, please see the parts editing topic.
8.7.1 Editing Parts
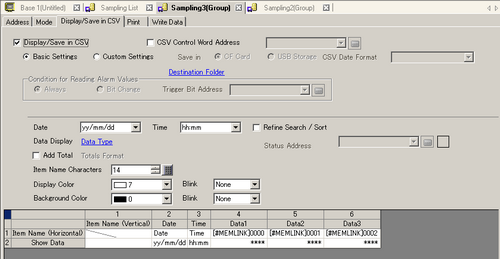
Configure settings to display Sampling Group "1" on the screen of the display unit.
In the [Common Settings (R)] menu, select [Sampling (D)] or click , and a list of registered sampling groups appear. Double-click the row for [Group] 1 and the sampling group 1 setup screen appears.
(For information about Address/Action settings, please refer to 25.3.1 Procedure - Sampling Data at Constant Intervals.)
Open the [Display/Save in CSV] tab. Select the [Display/Save in CSV] check box.
Select the display format for the date and time.
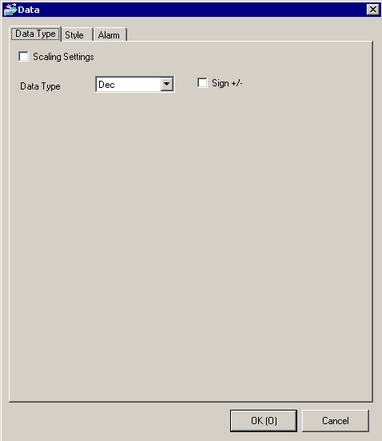
Click [Data Type] to open the [Data Settings] dialog box. Set the data type, source range, number of display digits, and so on. The settings are applied to all the data columns.
Click [OK] to close the dialog box.
Specify a display color (text color)/background color. The display format settings are complete.
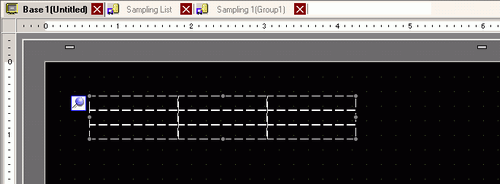
Open the editing screen, and on the [Parts (P)] menu select [Sampling Data Display (S)], or click , to place the Part on the screen.
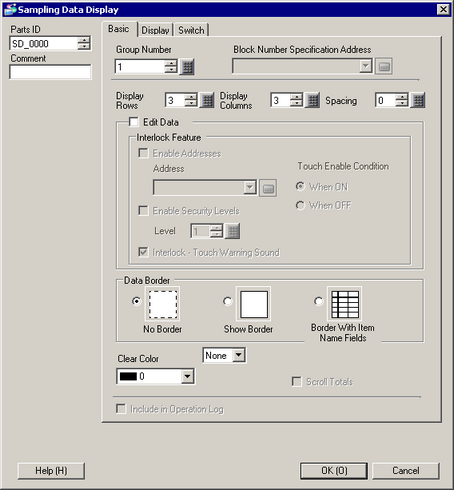
Double-click the placed Sampling Data Display. The [Sampling Data Display] dialog box appears.
Define the sampling group you want to display on the screen. Set Sampling Group No. to "1".
In the [Common Settings (R)] workspace's [Sampling] node, click the [Mode] tab. In the [Extended] settings, after you clear the [Overwrite old data after finishing the specified cycles] check box, use [Block Number Specification Address] to display the sampling group.
Set the [Display Rows] and [Display Columns].
When you wish to edit the sampling data on the screen, select the [Edit Data] check box, and set up a keypad for editing the data. The screen will change to the editing screen by touching the data, and the data can be edited using the keypad.
Select whether or not to show Ruled Line/Border and select the [Clear Color].
Select the [Display] tab, and set the font type and size.
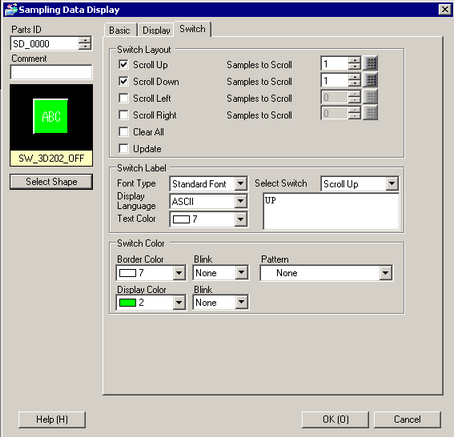
Select the [Switch] tab, and select the necessary scroll switches.
With [Select Shape], select the switch shapes, set the label and text color as needed, and click [OK].
The Sampling Data Display is now set. You can move the switches independently to the desired location.
For the attached [Sampling Data Display] switches, you cannot set the shape or color independently. To set a different shape or color for each switch, use a [Special Switch] set to [Sampling Data Display] (accessible from [Parts] menu, [Switch Lamp]).