| 1. |
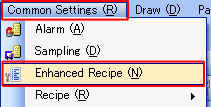
Click [Enhanced Recipe] on the [Common Settings] menu. |
|
 |
|
|
| 2. |
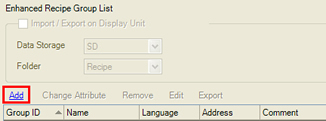
Click [Add] to create a new Enhanced Recipe Group. |
|
 |
|
 |
|
|
|
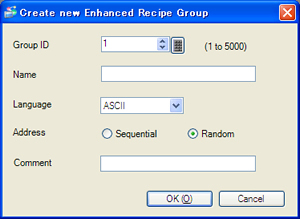
| Group ID |
: |
Specify a recipe group ID from 1 to 5000. |
| Name |
: |
Enter the group name within 32 characters or less.
Use one-byte characters, hyphens ( - ), underscores ( _ ), and spaces. |
| Language |
: |
Select the language you use for Recipe. |
|
|
|
|
To create a recipe in which various data are mixed, select [Random] for [Address].
Click [OK] after the setting is completed. |
|
|
| 3. |
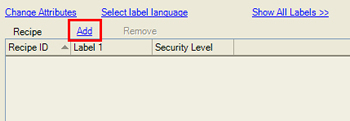
Click [Add]. |
|
 |
|
|
| 4. |
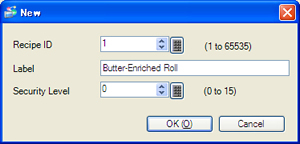
Set each recipe. (Ex: Butter-Enriched Roll) |
|
 |
|
|
|
| Recipe ID |
: |
Select any number from 1 to 65535 for ID of the recipe you create. |
| Label |
: |
Enter the name of the recipe you create within 32 characters.
The specified name is displayed in the [Enhanced Recipe List] as a label on the screen of the touch operator interface. |
| Security Level |
: |
Specify a security level for editing recipe data.
The recipe setting can be changed on the touch operator interface only with the authorization of the specified security level or higher. |
|
|
|
|
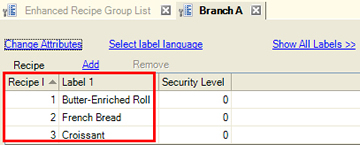
When you create a recipe, it is added in the list as shown below.
(Ex: Butter-Enriched Roll, French Bread, Croissant) |
|
 |
|
|
| 5. |
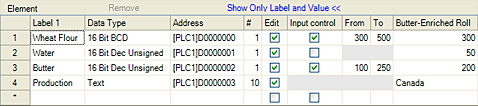
Specify data of each recipe.
Select the line of the Recipe ID, [1] in the [Recipe] list and double click each cell in the [Element] list for setup. |
|
 |
|
|
|
| Label |
: |
Enter up to 32 double-byte characters or 32 single-byte characters for the label name of the element.
The specified name is displayed as the element label on the Enhanced Recipe Data List. |
| Data Type |
: |
Select the data type of element values. |
| Address |
: |
Specify the start address that is ‘Transfer To’ (or ‘Transfer From’). |
| # |
: |
<If [Data Type] is anything other than [Text]>
Specify from 1 to 10,000 the number of consecutive addresses in words or bits starting from the address specified in the [Address] cell. If the [Data Type] is 32-bit, specify from 1 to 5,000.
<If [Data Type] is [Text]>
Set the number of characters, from 1 to 72, to display as the element value. |
| Edit |
: |
Specify whether to allow editing of element values on the Enhanced Recipe Data List. If the check box is selected, you can edit its value in the defined range, in the [From] and [To] fields. |
| Input Control |
: |
Set the element’s [From] and [To] values. You can select this option If [Data Type] is of integer or [32 Bit Float] and [ON]. |
| From/To |
: |
Set the minimum/the maximum value for element values. |
|
|
| NOTE |
If you select multiple labels, the elements of each selected label are displayed on the list. You can select multiple recipe labels in the ways below;
- Click with pushing the [Shift] key
- Click with pushing the [Ctrl] key
 |
|
|
|
|
|
The recipe data setting is now completed.
Make settings to transfer the recipe data. There are 2 ways to transfer the recipe data.
- Manual Transfer
(Touch the [Enhanced Recipe List] part on the screen of the touch operator interface) -> Setting Procedure
- Automatic Transfer (Transfer using system variables) -> Setting Procedure
|
|
|
|
| ■ Manual Transfer Setting |
| 1. |
Open the base screen, click [Parts]->[Enhanced Recipe]->[Enhanced Recipe List], and place a part. |
|
 |
|
|
| 2. |
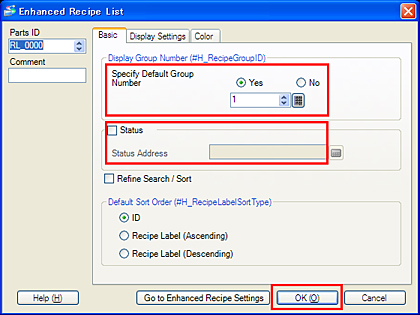
Double click the placed Enhanced Recipe List part, and the setting dialog box will appear. |
|
 |
|
Select [Yes] for [Specify Default Group Number]. Select the recipe group number.
And check [Status] and specify the address in which the editing result (Status) of the Enhanced Recipe List is stored.
For the [Display Settings] and [Color] tabs, make settings if needed. |
|
| NOTE |
If you narrow down or sort out what you need in the recipe labels to be displayed in the Enhanced Recipe List, check [Refine Search/ Sort].
* GP-4*01TW and GP-4401WW do not support [Refine Search / Sort] of Enhanced Recipe List. |
|
|
|
|
| 3. |
Click [OK]. |
| 4. |
Click [Parts]->[Enhanced Recipe]->[Enhanced Recipe Data List] and place a part. |
|
 |
|
|
| 5. |
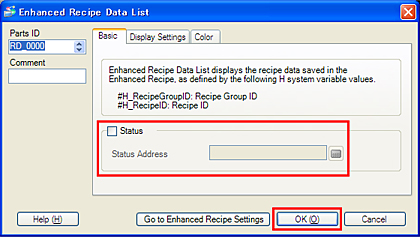
Double click the placed Enhanced Recipe Data List, and the setting dialog box will appear. |
|
 |
|
Check [Status] and specify the address in which the editing result (Status) of the Enhanced Recipe Data List is stored. |
|
|
| 6. |
Click [OK] to complete the setting. |
|
<Operation Example> |
|
 |
 Enhanced Recipe List Enhanced Recipe List
The Enhanced Recipe Setting’s [Label] names are displayed. |
Enhanced Recipe Data List
If you select a label on the Enhanced Recipe List, the [Elements] of the selected label are displayed. |
|
|
(1) Select the label you want to transfer on the Enhanced Recipe List.
(2) Check and change the contents of the selected label on the Enhanced Recipe Data List.
(3) Transfer the recipe data with the switch (GP->PLC or PLC->GP) of the Enhanced Recipe List. |
|
|
|
| ■ Automatic Transfer Setting |
Transfer the recipe data using the system variables available on GP-Pro EX.
Control the system variables with Data Display, D-Script, Logic etc. as you like. |
|
|
| <The system variables to use> |
| #H_RecipeGroupID |
: |
The number of Recipe Group ID is stored. |
| #H_RecipeID |
: |
The number of Recipe ID is stored. |
| #H_RecipeControlSend |
: |
The recipe data are transferred to the connected device when it’s ON. |
| #H_RecipeControlUpload |
: |
The data of the connected device are read and the recipe data of the specified ID on the touch operator interface are overwritten when it’s ON. |
| #H_RecipeProcessing |
: |
After the recipe data are transferred, the Bit1 (when sending) or the Bit3 (when receiving) is ON. |
|
| |
| <Operation Example> |
| (1) |
Store the Recipe Group ID in [#H_RecipeGroupID]. |
| (2) |
Store the Recipe ID in [#H_RecipeID]. |
| (3) |
Turn ON #H_RecipeControlSend when sending the data to the connected device and #H_RecipeControlUpload when receiving the data from the connected device. |
| (4) |
The corresponding bit of #H_RecipeProcessing is ON. |
| (5) |
Turn OFF the bit that has been turned on in the step (3). |
|
| NOTE |
| Reference: |
GP-Pro EX Reference Manual [Procedure-Creating and Transferring Enhanced Recipe Data] |
| |
GP-Pro EX Reference Manual [HMI System Variables - #H System Variables] |
| |
What’s the Enhanced Recipe function? |
|
|
| |


 沪ICP备05028659号-3