This procedure is used when sending the first project to the display unit.
For details about Send operations, refer to the following.
34.14.1 How Send Works
Please refer to the Settings Guide for details.
34.12 Settings Guide
If transfer is not successful even though the steps are followed, refer to the following.
Maintenance/Troubleshooting Guide, T.2.3 Unable to transfer project (USB transfer cable)
Connect the computer and display unit using the USB transfer cable.
If the USB cable driver is not installed, a dialog box appears. Install the driver as directed.
For information about USB cables and their installation method, refer to the following.
34.2 Transferring Project Files via USB Transfer Cable
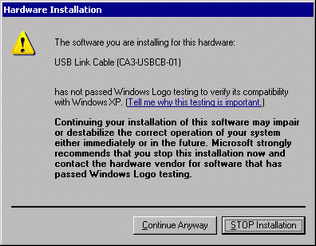
Depending on your Windows XP Security Level settings, the following [Install Hardware] dialog box may appear during USB driver installation. Click [Continue (C)] to start installation of the driver. Once installation has been completed, click [Finish].
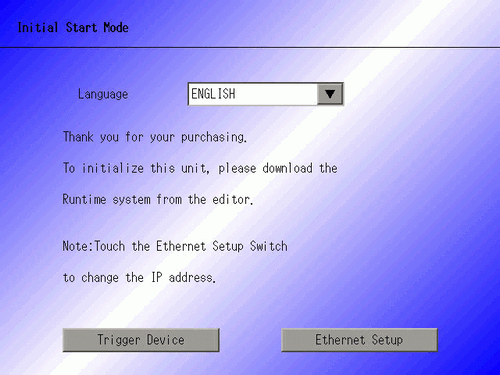
Turn ON the display unit. The [Initial Start Mode] screen appears on the display unit.
Display
This screen appears when you first power up the display unit. After transferring a project once, this screen will not appear.
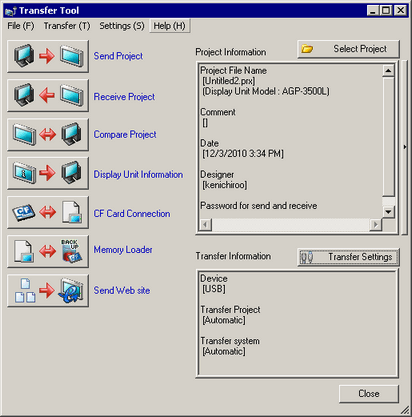
On the GP-Pro EX state toolbar, click the Transfer Project icon and launch the [Transfer Tool].
Confirm the project details in [Project Information].
To transfer a different project, click the [Select Project] button and choose the appropriate project.
In [Transfer Information], acknowledge that [Device] is [USB]. If [USB] is not selected, click [Transfer Settings] to display the [Transfer Settings] dialog box below. In [Communication Port Settings], select [USB] and click [OK].
Click [Send Project].
The transfer begins. When the following dialog box appears, click [Yes]. This dialog box is not displayed when the same project file is sent again.
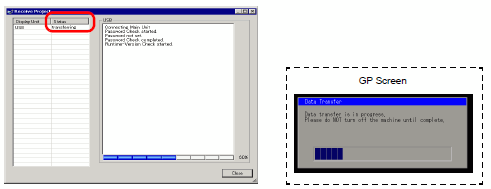
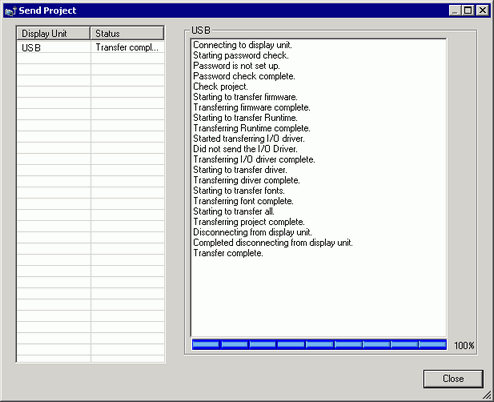
The following dialog box appears during transfer to check the communication status.
(During the transfer, the display unit changes to Transferring mode and communication with the device/PLC is suspended.)
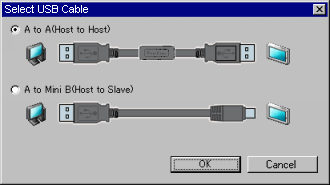
When connecting the USB data transfer cable (CA3-USBCB-01) and the ZC9USCBMB1 cable or a standard USB cable (Type A mini B), the [Select USB Cable] dialog box will display. Select which USB cable to use.
[A to A (Host to Host)]: Select when using [CA3-USBCB-01].
[A to Mini B (Host to Slave)]: Select when using [ZC9USCBMB1] or commercial USB cables (Type A mini B).
When transfer is completed, the state of the dialog box changes from [Transferring] to [Transfer Complete]. Click [Close].
(The display unit is reset and the transferred project screen is displayed.)
Click [Close] to return to the Transfer Tool. Click [Close] again to close the Transfer Tool.