![]()
-
For details about the setting screen, refer to the setting guide.
 M.16.2.7 Main Unit - Ethernet settings
Adjust the settings for the Ethernet connection. These settings are used for communicating with devices and PLCs, sending data during GP setup or project file transfer, or when using Pro-Server EX software.
![]()
For details about the setting screen, refer to the setting guide.
![]() M.16.2.7 Main Unit - Ethernet settings
M.16.2.7 Main Unit - Ethernet settings
Go to offline mode and touch [Main Unit Settings] on the item changeover switch.
[Main Unit Settings] screen opens. Touch [Ethernet Local Settings].
[Ethernet Local Settings] screen opens. Touch the IP address input field to display the numeric touch keys and then enter an IP address. (For example, 192.168.0.1)
![]()
For details about the IP address setting, ask your network administrator.
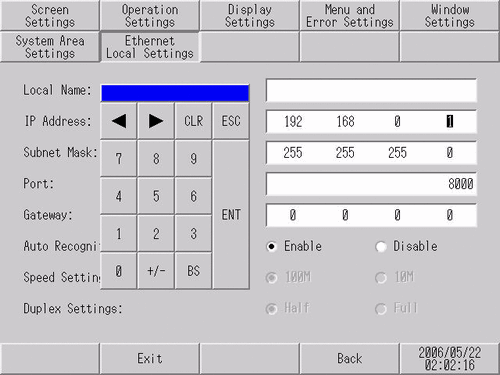
Using the same steps, specify the [Subnet Mask], [Port], and [Gateway].
![]()
The [Port] number specified here is used for set up via Ethernet, for transfer of project files, and for communication with Pro-Server EX. Do not change the initial value [8000].
[Exit] saves the changes and restarts the display unit.