-
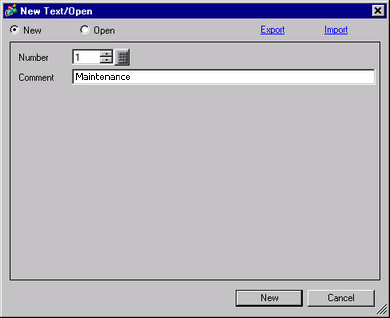
From the [Common Settings (R)] menu, select [Text Registration (T)] or click  . The [New Text/Open] dialog box appears.
-
Set the text number and comment, then click [New]. The text input screen appears.
For example, Number = "1", Comment = "Maintenance"
-
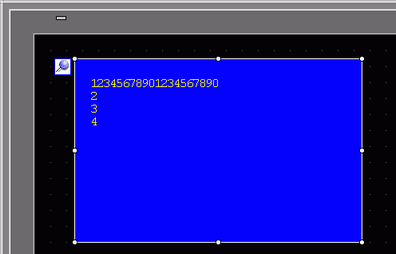
The text input screen appears. Enter the text for the message.

-
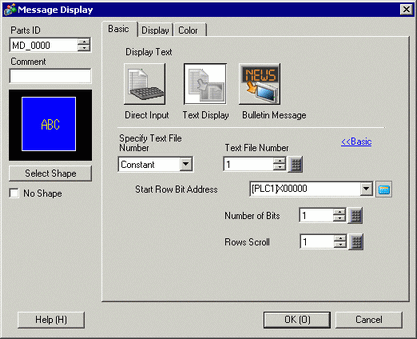
Next, configure the Message Display settings. Open the drawing screen. On the [Parts (P)] menu, select [Message Display (M)] or click  to open and display the screen on which you want to display the Text.
-
Double-click the new Message Display. The following dialog box appears.
-
Select [Text Display], and change the dialog box to [Extended] view.
-
In the [Specify Text File Number], select the method of specifying text to display. Set the [Text File Number].
-
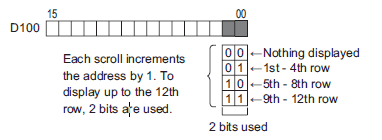
In [Start Row Bit Address], set the start address

-
Set a bit address or a word address to specify bits. If you set a bit address, [Number of Bits] of sequential addresses are assigned to set the display start row. If you set a word address, [Number of Bits] of sequential bits in the word (16 bits) are used.
-
In the [Number of Bits] field, set the number of bits to use for designating the start row display.
-
In the [Rows Scroll] field, set the number of text rows to scroll each time.
-
Click the [Display] tab. Set the [Display Characters] and [Display Rows].
-
As needed, set the Message Display color and text color on the [Color] tab, and click [OK]. The Message Display settings are complete.
-
Set a Switch to scroll through messages. From the [Parts (P)] menu, point to [Switch Lamp (C)] and select [Word Switch (W)] or click  . Place the switch on the screen.
-
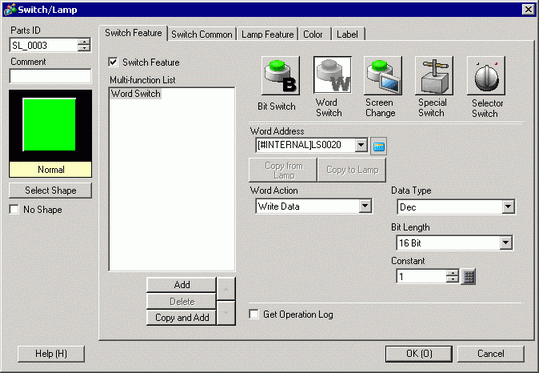
Double-click the placed Switch part. The following dialog box appears.
-
In [Select Shape], select the Switch shape.
-
In the [Word Address] field, set the address (D100) where you want to write data when you touch the switch.
-
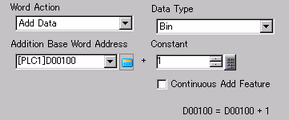
In the [Word Action] drop-down list, select [Add Data]. Set an address value in [Addition Base Word Address].
-
As needed, set the Switch color and label on the [Color] tab and [Label] tab, and click [OK]. A Switch to scroll to next text has been created.

-
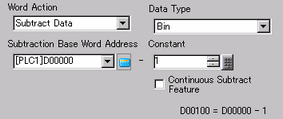
Create a Switch to scroll to previous text as well. Place a Word Switch and select [Subtract Data] from the [Word Action] drop-down list.
Two scroll switches have been placed.
 17.6.2.1 Text Display - Basic Settings / Basic