![]()
-
Please refer to the Settings Guide for details.
 12.7 Settings Guide
 -
For details on how to draw parts, and defining the address, shape, color, and labels, please see the parts editing topic.
 8.7.1 Editing Parts
![]()
Please refer to the Settings Guide for details.
![]() 12.7 Settings Guide
12.7 Settings Guide
For details on how to draw parts, and defining the address, shape, color, and labels, please see the parts editing topic.
![]() 8.7.1 Editing Parts
8.7.1 Editing Parts
Create a Window to call from a Base screen.
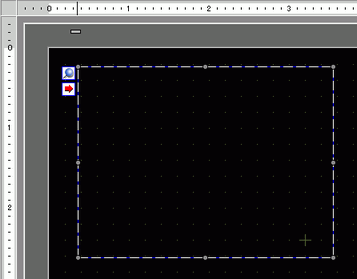
From the [Parts (P)] menu, select [Window (W)] or click ![]() . Place the Window on the Base screen. (On the display unit, the window is represented as a rectangle with a dotted line.)
. Place the Window on the Base screen. (On the display unit, the window is represented as a rectangle with a dotted line.)

![]()
When you put a window part on the screen, the ![]() icon displays the Window Screen loading area. Click the icon to display the loading screen for changing or confirming the settings.
icon displays the Window Screen loading area. Click the icon to display the loading screen for changing or confirming the settings.
Double-click the Window part. The setting dialog box appears.
On the [Basic] tab, from [Window Type], select [Activate Switch].

Set the [Window Number] to "1". (Or click the scaled-down window to display from the [Window Screen Number].)
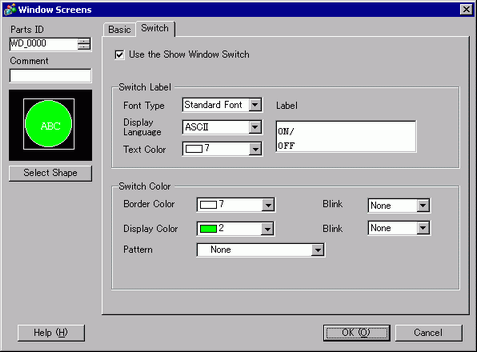
On the [Switch] tab, set the switch shape, color, and label.

![]()
Depending on the shape, you may not be able to change the color.
When you select a switch and press the [F2] key, you can directly edit the text on the label.
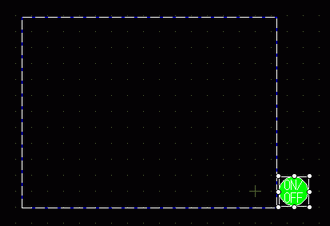
Click [OK]. A window with a switch attached is now set.

![]()
You can select the switch individually and move it to anywhere on the screen.
