![]()
-
Please refer to the Settings Guide for details.
 10.15 Switch/Lamp Parts Settings Guide
 -
For details on how to draw parts, and defining the address, shape, color, and labels, please see the parts editing topic.
 8.7.1 Editing Parts
![]()
Please refer to the Settings Guide for details.
![]() 10.15 Switch/Lamp Parts Settings Guide
10.15 Switch/Lamp Parts Settings Guide
For details on how to draw parts, and defining the address, shape, color, and labels, please see the parts editing topic.
![]() 8.7.1 Editing Parts
8.7.1 Editing Parts
Create a Switch which changes color (OFF: Green, ON: Red) each time it is pressed and the Bit Address (M100) operation occurs.
On the [Parts (P)] menu, point to [Switch Lamp], and select [Bit Switch (B)], or click ![]() to place a switch on the screen.
to place a switch on the screen.
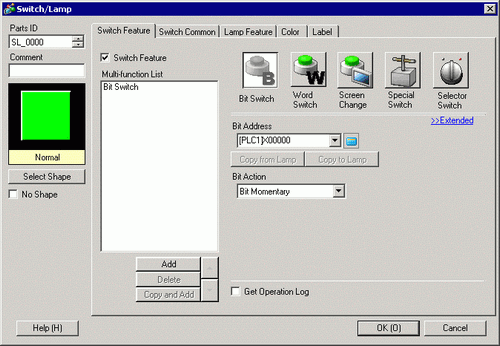
Double-click the placed Switch part. The following dialog box appears.

In [Select Shape], select the Switch shape.
Set up the [Bit Address] that you want to operate when you touch the switch.
From [Bit Action], choose [Bit Invert].
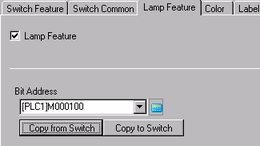
On the [Lamp Feature] tab, select the [Lamp Feature] check box and click [Copy from Switch]. The same address as the one designated on the [Switch Feature] tab will appear in [Bit Address].

On the [Color] tab, set the OFF state switch color (green).

In [Select State], select [ON] and set the ON state switch color (red).
As needed, set the text to display in each state on the [Label] tab, and click [OK].
![]()
When you select a switch and press the [F2] key, you can directly edit the text on the label. When [Text Table] is selected, you can change the current Text Table.