![]()
When using a model without a display portion, attach a display module.
If a project file cannot be transferred, you can force the display unit into transfer mode (waiting to receive project).
Use one of the following to enter forced transfer mode:
![]()
When using a model without a display portion, attach a display module.
Forced transfer by touching the screen
Using screen touch, you can forcibly transfer a project file.
When using models other than SP5000 Series (excluding Open Box), GP4000 Series and LT4000 Series
When using SP5000 Series (excluding Open Box), GP4000 Series and LT4000 Series
When using external storage on SP5000 Series (excluding Open Box), GP4000 Series and LT4000 Series
![]()
PCAP Technology. You cannot use touch to trigger a forced transfer on touch panels using PCAP technology.
When using models other than SP5000 Series (excluding Open Box), GP4000 Series and LT4000 Series
Using screen touch, you can forcibly transfer project files from GP-Pro EX.
When the power is turned on, continue touching the bottom left corner or the bottom right corner of the panel (within a 40 pixel area).

When the following dialog box appears, transfer project files from GP-Pro EX.
After transfer is complete, the display unit restarts and the transferred project's initial screen is displayed.
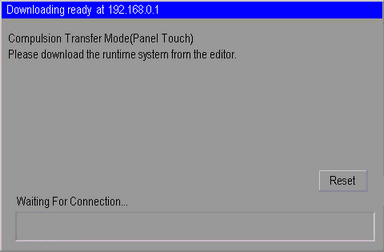
When using SP5000 Series (excluding Open Box), GP4000 Series and LT4000 Series
Using screen touch, you can forcibly transfer project files from GP-Pro EX.
When the power is turned on, continue touching the bottom left corner or the bottom right corner of the panel (within a 40 pixel area).

![]()
When using the GP-4100 Series (Monochrome Model), continue touching the bottom left corner or bottom right corner (within 20 pixels of the edge) of the panel.
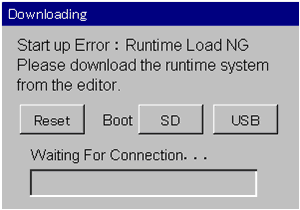
When the following dialog box appears, transfer project files from GP-Pro EX.
![]()
To run a forced transfer operation on a SP5000 Series unit (excluding Open Box) over Ethernet, use the LAN1 (Ethernet1) port. When the above dialog box appears, you cannot transfer using the LAN2 port.
When using external storage on SP5000 Series (excluding Open Box), GP4000 Series and LT4000 Series
In addition to transferring from GP-Pro EX, forced transfer is possible using external storage.
For forced transfer using external storage, from the [Memory Loader]'s [Transfer Tool] command, select [Create Backup File].
For the steps on how to create backup data, see the following.
![]() 34.8.1 Transfer - Transferring Project Files from PC to Display Unit
34.8.1 Transfer - Transferring Project Files from PC to Display Unit
When the power is turned on, continue touching the bottom left corner or the bottom right corner of the panel (within a 40 pixel area).

![]()
When using the GP-4100 Series (Monochrome Model), continue touching the bottom left corner or bottom right corner (within 20 pixels of the edge) of the panel.
When the following dialog box appears, touch [SD] or [USB].

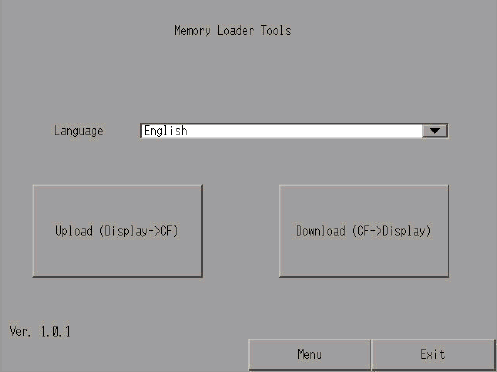
This will restart the display unit and launch the Memory Loader tool. Touch [Download] on the following screen.
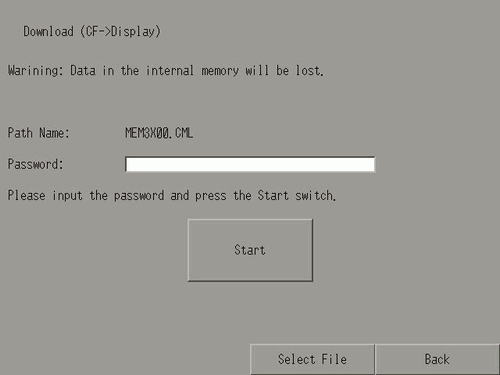
Select the file you want to transfer and touch [Start]. (If there is a password for transferring, input the password first, then touch [Start].)
After transfer is complete, the display unit restarts and the screen of the transferred project file is displayed.
Forced transfer by setting DIP switches
Set DIP switch 2 to ON to force the transfer of the project file. When using a model without DIP switches (such as the GP-3302B), use forced transfer by touching the screen.
Ensure that the display unit is turned OFF and then open the CF card cover at the bottom. Locate the CF card interface and DIP switches inside the cover and set DIP switch 2 to the ON position.

When the GP is turned ON and the following dialog box appears, transfer the project file from the GP-Pro EX. After forced transfer is complete, the display unit restarts and returns to the force transfer screen.
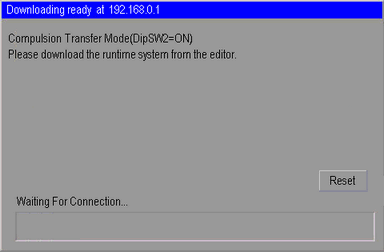
Turn OFF the display unit and then set DIP switch 2 to OFF. When you turn ON the display unit again, the above screen is displayed. Touch the [Reset] button. Always use the display unit with DIP switch 2 set to OFF except when forcing the transfer of project files.
Forced transfer with operation set up on a switch (GP-4G01)
You can use a switch on the unit to force the transfer of the project file.
While GP-4G01 is not powered, press and hold the [USB storage eject switch] and power ON the unit.
GP-4G01 starts up, then check that the error LED is red. The project file is transferred from GP-Pro EX.