![]()
Please refer to the Settings Guide for details.
 34.12 Settings Guide
Compares the project currently open in GP-Pro EX to that stored on the display unit connected through LAN.
![]()
Please refer to the Settings Guide for details.![]() 34.12 Settings Guide
34.12 Settings Guide
On the GP-Pro EX state toolbar, click the Transfer Project icon ![]() and launch the [Transfer Tool].
and launch the [Transfer Tool].
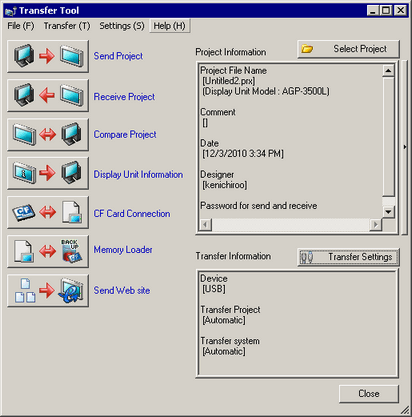
Click [Transfer Setting] to display the [Transfer Tool] dialog box. Ensure that [Communication Port Settings] is set to [LAN]. Select the [LAN Auto Setting] check box and click [OK].

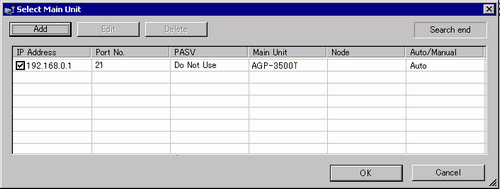
Select each IP address of the display unit to compare project data and click [OK].
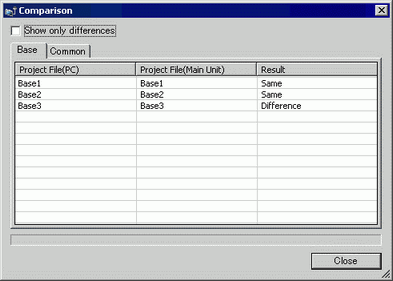
The following [Comparison] dialog box appears and displays the results of the comparison between the PC and display unit.
![]()
Select the [Show Only Differences] check box. The comparison results show screens that are different.
If the logic programs, or settings that affect logic programs, are different in the compared projects, the [Control Settings] will vary. [Control Settings] indicates settings related to logic programs.
When comparing projects with different device/PLC configurations, the [Common] tab shows the [Communication Settings] item. Moreover, when comparing projects with indirect devices, the [Device-Specific Settings] item will show.
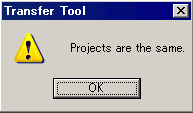
The comparison result for the two projects may appear to be the same on the screen, but they may actually be [Different].
This is because updated information in the project is managed per screen and per configuration.
Example:
Display unit: ABC.prx
GP-Pro EX: ABC.prx (a project containing a deleted base screen which was saved and re-copied).
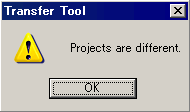
A message is displayed when there is no difference between projects or if there is a difference in the file date/time stamps.
For example, if you open an existing project and save it using [Save As], the date/time stamp changes and it will be considered as a different project.
After confirming the results, click [Close].