Please refer to the Settings Guide for details.
26.15.1 Transfer Filing Data (Mode)
26.16.1 Filing Display
For details on how to draw parts, and defining the address, shape, color, and labels, please see the parts editing topic.
8.7.1 Editing Parts
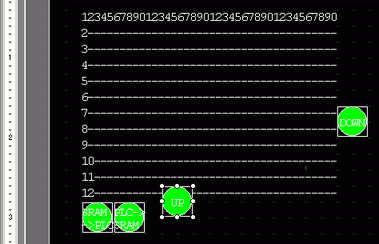
On the screen's Special Data Display [Filing], the following settings show how to designate and transfer the recipes by touching them.
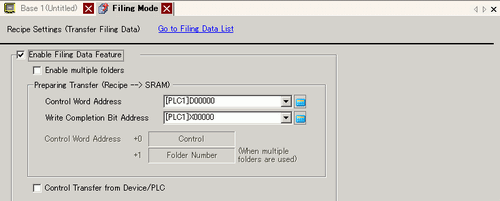
From the [Common Settings (R)] menu, point to [Recipe (R)] and select [Transfer Filing Data (Mode) (A)] or click . The following window appears.
Select the [Enable Filing Data Feature] check box.
In [Control Word Address], set the address. Two consecutive words are used, starting from the set address.
In [Write Completion Bit Address], set the address
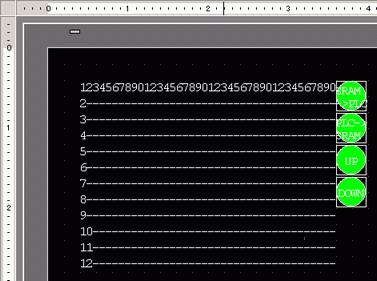
Open the screen editor. From the [Parts (P)] menu, point to [Special Data Display (P)] and select [Filing (F)]. Place the Part on the screen.
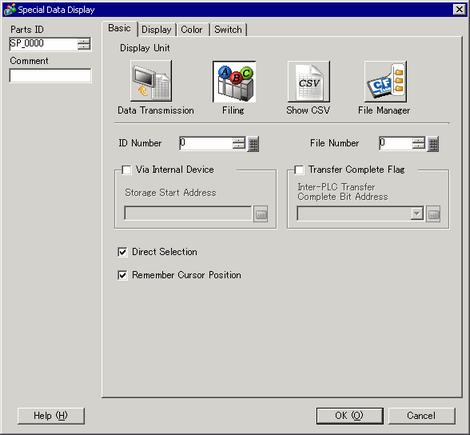
Double-click the new Special Data Display. The settings dialog box appears.
In [ID Number], set the number of the Special Data Display [Filing].
When displaying multiple Special Data Displays [Filing] on the screen, be sure not to use the same [ID Number].
In [File Number], set the file number of the Special Data Display [Filing] you want to display.
All the item names contained in the file designated here can be displayed in a list and transferred.
Select the [Display] tab. Set the [Font] and [Display Format].
Select the [Color] tab and set the text and background color.
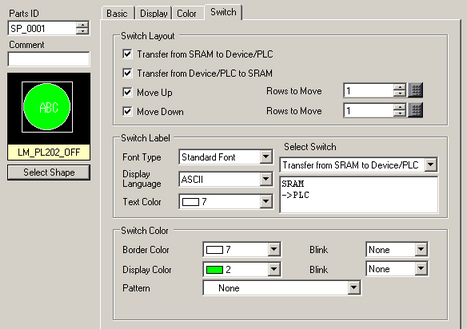
Select the [Switch] tab and select the operation switches you want to place.
Set the number of rows that a scroll switch moves when pressed.
Select the shapes, label and text color, and click [OK (O)].
Depending on the switch type, [Switch Color] may be enabled.
When you select a switch and press the [F2] key, you can directly edit the text on the label.
Special Data Display Part [Filing] is now configured. You can move the switches to the appropriate locations.
If you want to save filing data in backup memory (SRAM) to external storage, in the System Settings, select [Display Unit] and click the [Mode] tab. In the [Memory Card Settings] area select the [Save Data] check box and define the [Control Word Address].
The Control Word Address works the same way as saving Alarm History.
20.8.2 Control Word Address for Data Save