In order to use this feature, from the [System Settings] window's [Display Unit] link, click the [Extended Settings] tab, and in the [Load Text Table] area select the [Enable Load Text Table] check box.
Please refer to the Settings Guide for details.
18.7.1 Common [Text Table] Settings Guide
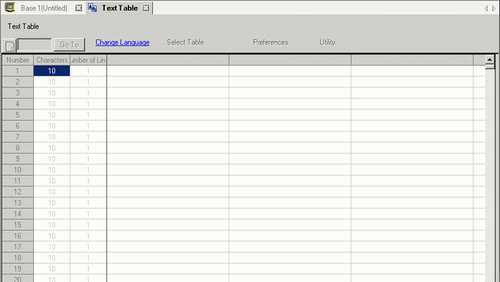
From the [Common Settings (R)] menu, select [Text Table (S)] or click . The following window opens.
When you edit and use a registered Text Table, open the data you want to edit.
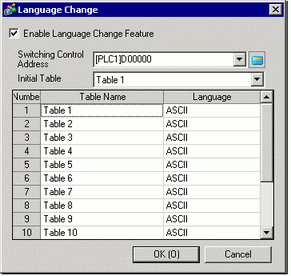
Click [Language Change] The following dialog box appears. Select the [Enable Language Change Feature] check box.
If you clear the [Enable Language Change Feature] check box, the Text Table data that has been specified is deleted.
Select each Table's display language and click [OK (O)].
In the Text Table, set the [Characters] and [Number of Lines] and input words or simple messages in each table and click [OK].
When you completed the entry to Text Table, select [Create Display Unit File] from [Utility].
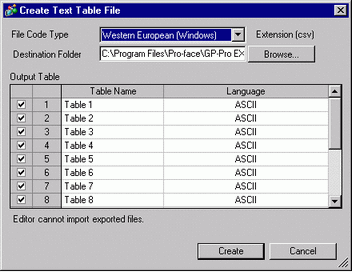
Select [File Code Type]. The [Destination Folder] allows you to select the folder to save the created file.
Make sure that the table you want to output is selected in [Output Table].
When you click the [Create] button, the Text Table file is created in the destination folder specified in [Destination Folder].
If you want to configure the Text Table data to be read at every startup, from the [System Settings] window's [Display Unit] page, click the [Extended Settings] tab, and in the [Load Text Table] area select the [Read File at Startup] check box. With this setting, it may take some time to start up the display unit.
For details on the settings, refer to the following.
5.4.7 System Settings [Display Unit] - [Extended] Settings Guide
To load using a defined timing, from the display unit's offline menu touch the [Manually Load] property's [Start] button.
For information about offline mode operations, see the following.
Maintenance/Troubleshooting Guide, M.7.1 Reading the string table data stored in the external storage