| Introduction | |
| Summary | |
| System Environment | |
| Requirements | |
| Restrictions | |
| Note | |
| Startup | |
| Backup | |
| Recovery | |
| FAQ |
| 1. | It is forbidden to copy the contents of this manual in whole, or in part, without the permission of the our company's. |
| 2. | The information in this manual is subject to change without notice. |
| 3. | This manual was written with care; however, if you should find any errors or omissions, please contact our company's and inform them of your findings. |
| 4. | Please be aware that our company's is not responsible for any damages resulting from the use of our products. |
| 5. | All product names that appear in this document are the trademarks of their respected companies. |
| 6. | Even though the information contained in and displayed by this product may be related to intangible or intellectual properties of the our company's or third parties, the our company's shall not warrant or grant the use of said properties to any users and/or other third parties. |

| |
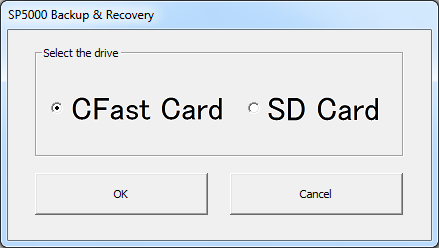
| Startup Window |
| |
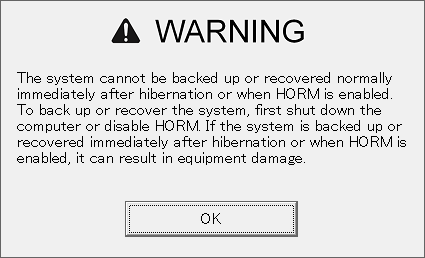
| Warning Window |

| |
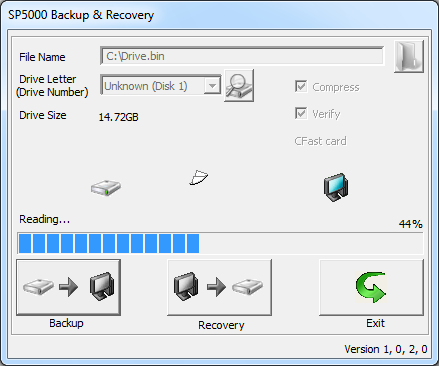
| Main Window |
| No. | Item | Description |
|---|---|---|
| 1 | File Name | Enter the file name. |
| 2 | Drive Letter(Drive Number) | Select the drive. |
| 3 | Drive Size | Selected drive size is displayed. |
| 4 | Reference Button | File is referred. |
| 5 | Update Button | Drive information is updated. |
| 6 | Compress | Compress backup data. |
| 7 | Verify | Verify backup data and recovery data. |
| 8 | Drive Type | The type of selected drive is displayed. |
| 9 | Animation Display | Current work status is displayed with an animation. |
| 10 | Progress Bar | Current progress is displayed. |
| 11 | Backup | Backup of the drive is made. |
| 12 | Recovery | Recovery is performed to the drive. |
| 13 | Exit | Application is quitted. |
| |
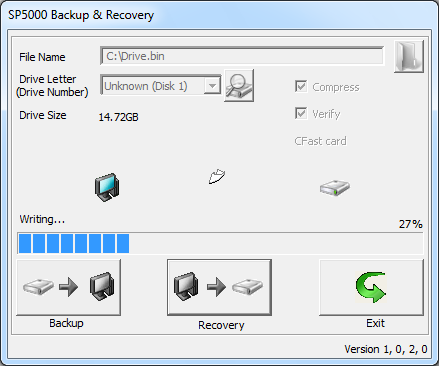
| Backup Window |
| |
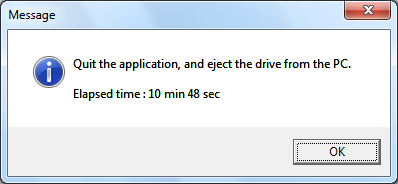
| Backup Complete Window |
| Step | Description |
|---|---|
| 1 | Insert drive into PC or SP-5B40. |
| 2 | Start SP5000BackupRecovery up. |
| 3 | Select "CFast Card" or "SD Card". |
| 4 | Select a drive for backup from "Drive Letter". |
| 5 | Click "Reference Button" and select a file for backup. Can also drag and drop a file for overwrite into the window. |
| 6 | Select whether to enable "Compress" and "Verify" or not. |
| 7 | Execute backup. |
| 8 | When backup is completed, "Backup Complete Window" is displayed. |
| 9 | Quit the application, and eject the drive from the PC. |
| |
| Recovery Window |
| |
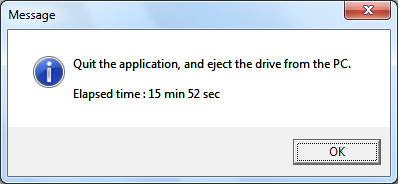
| Recovery Complete Window |
| Step | Description |
|---|---|
| 1 | Insert drive into PC or SP-5B40. |
| 2 | Start SP5000BackupRecovery up. |
| 3 | Select "CFast Card" or "SD Card". |
| 4 | Select a drive for recovery from "Drive Letter". |
| 5 | Click "Reference Button" and select a file for recovery. Can also drag and drop a file for overwrite into the window. |
| 6 | Select whether to enable "Verify" or not. *"Compress" is not used. |
| 7 | Execute recovery. |
| 8 | When recovery is completed, "Recovery Complete Window" is displayed. |
| 9 | Quit the application, and eject the drive from the PC. |
| A1. | Click "Update Button". Then, drive information will be updated. |
| |
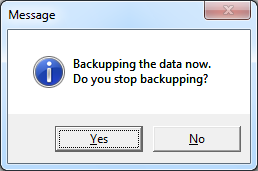
| Confirmation Window for Backup Stop |
| A2. | "Confirmation Window for Backup Stop" is displayed. |
| When the backup is stopped, the temporary file that is being backed up is deleted. |
| |
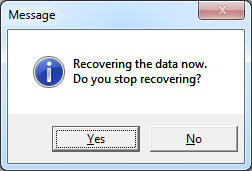
| Confirmation Window for Recovery Stop |
| A3. | "Confirmation Window for Recovery Stop" is displayed. |
| If recovery is stopped, the drive does not operate as normal. | |
| In order to operate it as normal, you need to complete recovery again. |
| A4. | Insert a next drive and restart the application after backup or recovery is completed. |
| A5. | C drive is not applicable to backup and recovery. |
| Current drive that SP5000BackupRecovery is started up is either. | |
| Example: USB memory is not applicable if SP5000BackupRecovery is started up on this USB memory. |
| A6. | No, you can't. |
| You can only use our CFast card/SD card. |
| A7. | Quit SP5000BackupRecovery. Then, reinsert the drive and restart it. |
| If an error occurs again, the drive may be damaged. | |
| In this case, change the drive. |
| A8. | Can not specify only file name. |
| Please also specify a drive name. |
| A9. | Causes that can be considered are as follows. |
| 1. The drive is read only. | |
| 2. The drive is unallocated and is formatted as file system. | |
| In the case of 1, change the state of drive to writable by a specified way. | |
| In the case of 2, re-execute it from "Drive Letter" after allocate "Drive Letter" or delete volume. |
| A10. | It depends on a notebook computer. |
| However, we do not guarantee to run on the environment. |
| |
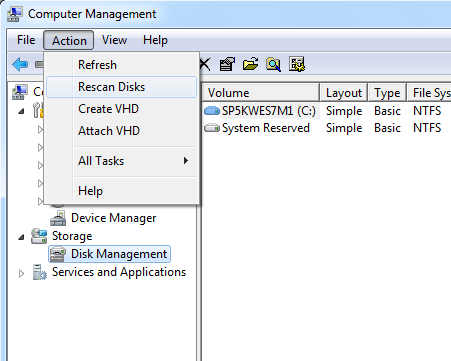
| Computer Management Window |
| A11. | It depends on a environment to take some time to recognize a drive. |
| Start "Computer Management" in Administrative Tools for Control Panel up, select "Disk Management", execute "Rescan Disks" in "Action" menu. |
| A12. | It depends on a environment. |
| OS:Windows 7 64bit | |
| CPU:Intel(R) Core(TM) i5 2.5GHz | |
| Memory:4GB |
| Compress | Verify | Backup | Recovery |
|---|---|---|---|
| Enable | Enable | 12min | 22min |
| Enable | Disable | 11min | 16min |
| Disable | Enable | 6min | 22min |
| Disable | Disable | 5min | 16min |
| Compress | Verify | Backup | Recovery |
|---|---|---|---|
| Enable | Enable | 2min | 3min |
| Enable | Disable | 2min | 2min |
| Disable | Enable | 2min | 3min |
| Disable | Disable | 1min | 2min |